2011年9月29日星期四

2001 --- 2011 Ten Years' Development of Smart Phone

Nowadays, Cell phone becomes a necessary thing when people go out as key and wallet. Customers now are giving more attention to smart phones, which can link to internet and freely download apps from app store and internet. So, what about the beginning of the smart phone and how the smart phone developed during the 10 years? Now let us talk about the 10 years' development of smart phone.

2001: The born of Symbian and Ericsson Produced the First Smart Phone

At the beginning of 2001, Ericsson released the first smart phone R380s based on Symbian, which had a touch screen under a flip. This kind of PDA + Phone model became a kind of smart phone model: Symbian UIQ. R380s pointed a bright future to Sony Ericsson P800 and P900 series. That is the first smart phone in the world.


2002: Microsoft and Palm Breaking out

Nokia 7650 is the first phone based on Symbian S60. Having a clear interface as normal cell phone, S60 users can freely expand function to their phones. Inner-build camera and MMS supported help Nokia 7650 gain a much attention. The later N seris proved that Nokia choose a right direction on smart phone design for these years.

Handspring's first smart phone is Treo 180(Palm OS). It is interesting that its processor is come from MOTOROLA and only 33MHz and 16MB memory, however, at that time, it is one of the big storage space.

At the end of 2002, Windows Mobile Dopod 686 is released and receives a lot of eyes because the Windows PC liked interface and easy to use. And I would like to piont out that the OEM of Dopod 686 is HTC(now one of the most popular smart phone producers).

Sony Ericsson P800 is the first smart phone using Symbian UIQ touch screen, at the same time, it also has a Keypad which is really convinient for many bussiness man and they love it very much. Sony Ericsson P800 is relased at the end of 2002 and Flight mode is first appear at P800.

2003: Microsoft VS Symbian

At 2003, handSpring published GSM Treo 270 and Treo 300, frist introduced colorful screen and Blazer Browser. At that time Palm OS has many cellphone software for users to read ebook, play cellphone game and surfing the internet. Also Palm OS can share files with infared port. Treo leads RIM BlackBerry on most fields. Except sending Email, BalckBerry mainly attracts bussiness man.

The smart phone of 2003 is Dopod 696 without any doubt. Dopod 696 is warmly welcomed by bussiness man because it is using Windows Mobile 2003 for Pocket PC Phone Edition which is really like Wins PC. Dopod 696 is the most classic Windows Mobile smart phones.

Nokia N-Gage is the first mix of smart phone and game boy. All of us can not predict that the reall PSP smart phone will appear 7 years later with Android system.

Treo 600 is the last one from Handspring. This small Palm OS smart phone is one of the best touch feeling full keyboard smart phone. It is momeried by users with its nice-feeling keyboard and fast Palm single task system. After Palm buy Handspring and its hardware department and Handspring made up of the PalmOne and produced the later Palm smart phones.

2004: Treo led the way, Symbian and Mircrosoft getting better

Treo 650, the most successful smart phone in Palm history, is released in 2004. This powerful all running easy to use full keyboard smart phone improve the resolution and color and succeed the fast operation and nice hand-feeling. However, because of the browser of Palm OS can not keep pace with the development of internet and the bad market strategy, it is the beginning of the Palm's failure.

In this year, Symbian's 7610 and 6670 make Nokia the king of smart phone. Dopod 818 is welcomed by female users because the its size is suitable for female and gives a new impression of Windows Mobile smart phones. MOTO still using its Linux and published E680 and A780 two classic smart phone.

2005: S60, the king of smart phone system

With a 2-megapixel camera and cool appearence, Nokia N70 and its Symbian S60 system gain great attention. From N70, Nokia's Symbian S60 system is getting better and better and most of S60 users first became S60 and Nokia lovers.

At 2005, RIM published 8700 seris and became the model of morden BlackBerry phones. Also in this year, RIM has 4 million users all around the world.

2006: The era of Nokia

Nokia N73 is released at 2005 with perfect appearence and performence. This is the peak of Symbian S60. It is like today's iPhone. Later Nokia published different edition of N73, and also received high attention.

At the same year, Nokia smells the bussiness smart phone and published E61 with full keyboard and it is the begning of Nokia Bussiness seris E.

2007: Nokia N95 VS Apple iPhone

At the begning of 2007, Apple released the first generation of iPhone. At first iPhone is not optimistic from many analyst. However, the first week, iPhone sold out 270,000 suites and more than 400million in 2007. iPhone received the most succesfull invention 2007 from "Times". Unique interface, gravity sensing and muti-touch and other new tech make iPhone having large fans on the planet. But, at that time, Nokia N95 is also one of the most popular smart phone.

Dopod S1 is also released in 2007, This "iPhone killer" is using HTC own TouchFLO interface with Windows Mobile system, but Windows Mobile is nothing better than Apple OS. This is one of the reason that Microsoft stop Windows Mobile and make its fans unhappy.

At the end of 2007 another giant of today's smart phone market "Android" is first introduced by Google. This strange small robot is now the biggest competitor

2008: Android, iPhone 3GS and the end of former king

The second generation of iPhone, iPhone 3GS, and App Store born together in 2008. The App Store makes iPhone more and more complete. Apple's charm and nice commission make the App Store no longer a useless shop. Apple Store is the sign of Apple's fully success.

Windows Mobile smart phone still makes no change deeply and the only highlight is HTC Touch Diamond.

At the second half of 2008, the first Android T-mobile G1 borned. This sliding keyboard Android 1.0 giving people a new model of smart phone system. From G1, Android system joins the competition of smart phone.

You have to talk about Nokia E71. At 2008, Nokia E71 makes Nokia still in customers memories. And Nokia 5800's release is not even success for Nokia.

2009: iPhone VS Android

iPhone 3GS receives most people's heart after App Store supply rich source of App. Altough the appearence is the same, iPhone 3GS still gets warm welcome for its double fast processor.

At the same time, anothe so called "iPhone killer" Palm Pre is published. Its webOS notice and gesture give users fresh feeling, but the lackness of app and windows mobile's failure making Palm Pre can not threaten iPhone becomes the king of smart phone.

At the end of 2009, MOTO's Android Droid released, nice design and well developed Android system help it sold out 105 million suits after published 74 days and its GSM edition "Milestone" now becomes one of the most classic Android smart phones.

2010: iPhone 4 Released

January, 2010, Google published its own first smart phone Nexus One, OEM by HTC. This smart phone can first update to the latest Android system and makes other Android phones fell bad. However, internet sell makes its performence average and it has some hardware problem can not be solved even today.

February, 2010, Samsung introduced its own system Bada at MWC in Barcelona and the first smart phone with Bada Samsung S8500. Samsung finally has its own operartion system Bada. Also one the MWC, Microsoft introduced Windows Phone 7 and in October punlished it and 10 smart phones with Windows Phone 7. Their proformence is still not good under the shadow of iOS and Android.

April, 2010, HP buy Palm with $1.2 billion and HP share price down 1% immediatly.

27, April, 2010, Nokia published its latest symbian 3 and Nokia N8 with 12 million pixels camera.

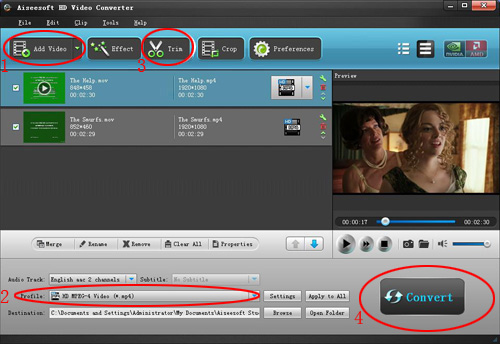
Iphone 4 is published on WWDC 2010 and becomes the most popular smart phone on the market. It is the most successful smart phone in the history. Its users enjoy themselves with iPhone 4 most with total video converter.

2011: Google & MOTO VS Apple

2011 is the most unrest year for smart phone industry. MOTO and Sony Ericsson already use Android only and Samsung, LG, HTC use Android as the main system.

At the beginning of 2011, Samsung published Android smart phone GALAXY S II and sold out 500 million after 85 days.

Febuary 11, 2011, Nokia announced that they and Microsoft became Strategic Partner and made Windows Phone as its main smart phone system.

April 27th 2011, Nokia and Accenture signed strategic cooperation agreement and Accenture will respossible for the research and development of Symbian system. About 3000 Nokia employee become Accenture's staff.

June 21st 2011, Singapore, Nokia Connection 2011, Nokia officially published Meego smart phone N9 and later will on the market. And this is possible the last smart phone with Meego.

July 15th 2011, Google CEO Larry Page said that 550,000 Android deveces were activited everyday and now totally 135 million Android deveces on the world and more than 400 kinds of Android deveces on the market.

August 15th 2011, Google purcheased MOTOROLA as $40 per share and in a total of $12.5 billion. August 18th 2011, HP announced stop webOS devece's sale and sell their first TouchPad as $99.

It is said that iPhone 5 and iPhone 4S will be released on October 2011. During ten years' development, smart phone industry is like a game who will be the winner and who will be the next one that disappear from customers memories?

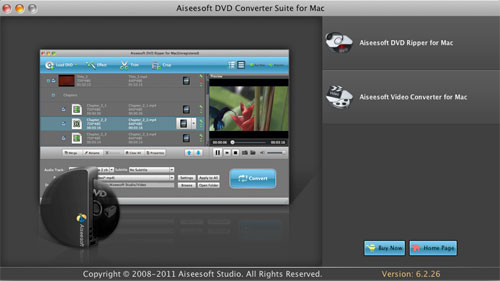
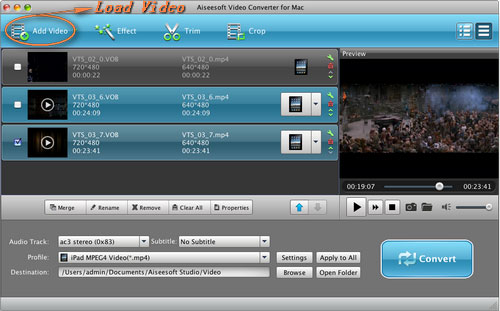
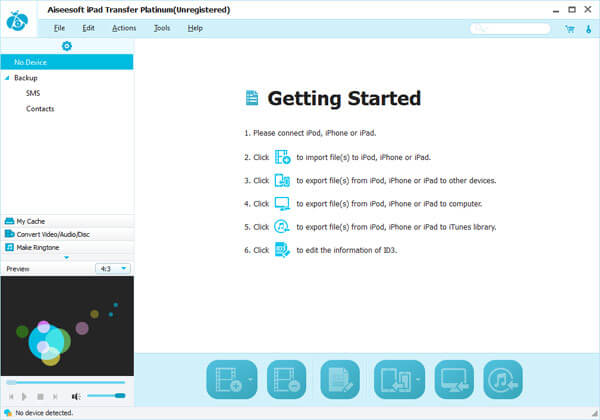
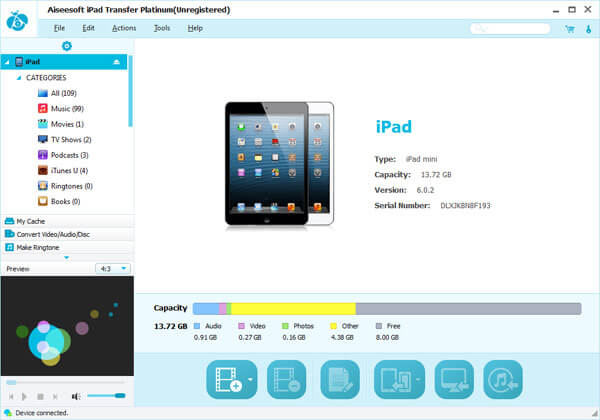
iPad Transfer Software | Best DVD Ripper | Video Converter for Mac

2011年9月26日星期一

How to Put DVD/Video on iPod, PSP, Computer, Zune, Xbox (Mac/Windows)

Many Mac users have iPod, PSP and other portable devices, but they can only enjoy songs and videos from iTunes or buy them from internet, because there is seldom nice Mac DVD and Video covnerter for iPod, PSP and other devices. Today I will introduce you an excellent DVD/Video converter for Mac: Aiseesoft DVD Converter for Mac It allows you to put your own DVDs and you own videos on your iPod, PSP, Mac Computer and other players on Mac.


This article aims to show you how to put your DVDs and videos on your iPod, PSP, Computer, Zune, Xbox and other players for Mac users.

Part 1. Convert DVD for Mac with Aiseesoft DVD Ripper for Mac

Step 1. Load DVD
Insert DVD into your DVD-ROM, run DVD Ripper for Mac, click “Load DVD”, find the DVD folder of the movie you want to add from your DVD-ROM, and Click “Open”.

Step 2. Set output format.
This best DVD ripper for Mac provides you output formats as many as you want. Just choose one from the drop down list “profile” according to your portable player.

If you are very professional with your player, you can also set your output parameter values such as Resolution, Frame Rate, Bitrate and Sample Rate and so on.

Tips:
1. Trim:

If you want to rip only a part of the DVD movie, please click “Trim” button and drag the “Start trim slider” to set the start time and “End trim slider” to set the end time. (a). You can also do that by clicking the “Start trim button” and “End trim button”(b). The third way you do that is set the exact Start/End time at the right of the pop-up window and click “OK”.

2. Crop:
If you want to remove the black edges or you want to rip a certain area of your video, please click the “Crop” button. You can do this either by drag the frame around the movie (a) or set the crop value: “Top, Left, Bottom, Right”.(b). Another way to do that is choose mode from “Crop Mode”(c).DVD Ripper for Mac also allows you to choose the output aspect ratio above the crop panel, “Keep Original, full screen, 16:9 and 4:3” are available.

3. Effect:
If you want to adjust the effect of your movie, please click the “Effect” button and a pop-up effect window will appear. It allows you to edit your movie’s effect including “Brightness, Contrast, Hue, Saturation and Volume”.

Click “Start” to begin your conversion.

Part 2. Convert videos for Mac with AiseesoftVideo Converter for Mac

Step 1. Choose “Video Converter for Mac” on the main interface.


Step 2. Add video
Click “Add File” to load your video that you want to put.
Step 3. Choose output profile and settings.
You can choose your output format from the drop down list and you can set the exact values of your output videos, such as Resolution, Frame Rate and so on.

You can do the video editing as the same way of convert DVDs.
After getting your satisfying video, then click “Start” button to start your conversion.

If you are a window user, Aiseesoft DVD Converter is your best choice.
It is the perfect combination of Aiseesoft DVD Ripper, Aiseesoft Total Video Converter and Aiseesoft iPod to Computer Transfer. With this powerful DVD Converter Suite, you can easily convert DVD and video to all the popular formats: MP4, H.264, AVI, MP3, WMV, WMA, FLV, MKV, MPEG-1, MPEG-2, 3GP, 3GPP, VOB, DivX, Mov, RM, RMVB, M4A, AAC, WAV, etc
And transfer your iPod songs and videos to your computer easily.

2011年9月25日星期日

Aiseesoft Releases iPad Transfer Platinum: Best iPad Assistant Tool

To provide users with the best iPad assistant software, Aiseesoft releases a professional iPad Transfer Platinum. This powerful iPad transferring software can meet nearly all needs of iPad users, such as transferring all types of files, and converting Blu-ray/DVD/video files to iPad, etc.

Compared with the standard edition of Aiseesoft iPad Transfer, this iPad Transfer Platinum supports more document types. It can help customers transfer music, movies, pictures, TV shows, Podcast, iTunes U, eBooks, Camera Roll, voice memos, camera shot from iPad to computer. Also this software is able to import music, video, ePub, PDF, image files from computer to iPad. What's more, this amazing transferring software supports transferring these files between iOS devices. For instance, users can transfer favorite songs from iPad to iPhone or iPod for enjoyment.

This professional iPad Transfer Platinum can also act as the iPad converting software. It can convert Blu-ray (BD), DVD, and videos to iPad compatible video/audio formats. And the powerful video editing features allow users to trim video segment and convert it to iPad, crop video frame, add any watermark to video, adjust video effect, and so on. And this iPad Transfer Platinum has adopted the AMD APP and NVIDIA® CUDA™ GPU acceleration technology, which can bring much higher converting speed while converting files to iPad on computer with the CUDA-enabled or AMD APP-enables GPU.

Plus, this iPad Transfer Platinum supports all Apple iOS devices (iPad, iPhone and iPod). For iPhone users, this software can backup iPhone SMS and Contacts to computer, and create iPhone M4R ringtones with any video, audio and DVD source.

In a word, Aiseesoft iPad Transfer Platinum is definitely the best and most powerful assistant tool for iOS devices. It can help iPad users convert BD/DVD/video to iPad and transfer all files between iPad and computer.

System Requirements

OS Supported: Windows NT4/2000/2003/XP and Windows Vista, Windows 7

Hardware Requirements: 800MHz Intel or AMD CPU, or above; 512MB RAM or more

2011年9月24日星期六

How to transfer songs from iPad to iPad?

If you are still be confused about how to transfer music/songs from iPad to another iPad, transfer songs from your family or friends' iPad to your iPad, you have found the right place. Here I will recommend you a professional iPad transferring software – Aiseesoft iPad Transfer Platinum to help you deal with transferring iPad files issues.

This amazing iPad transferring software can help you conveniently transfer songs from iPad to another iPad. Also it can assist you to transfer music between different iOS devices, like from iPad to iPhone, from iPhone to iPad, from iPod touch to iPad, from iPad to iPod touch, etc.

iPad Transfer

Now free download and install the iPad to iPad Transfer, and then follow the guide to transfer iPad music to iPad.

Step 1: Launch the iPad to iPad Transfer

After launching the iPad to iPad Music Transfer, you can connect the two iPad devices to your computer. And this application will detect the devices immediately.

Step 2: Choose the songs you want to transfer

All iPad files, like music, movies, pictures, books, TV shows, etc., of the source iPad will be listed on the left panel. Now you need to choose the "Music" category to view all songs stores on your iPad. And this iPad Transfer Platinum will show all music files on the right panel for you to choose.

Tips: This iPad transferring software owns a built-in player. If you are not so sure about the music you choose, you can prelisten the song with the music play.

Step 3: Start to transfer music

After you have chose all songs that are supposed to be transferred, you can click the "Transfer files from device to device" button to transfer the music from iPad to another iPad.

2011年9月22日星期四

Aiseesoft's Newly Updated DVD Converter Suite Supports More Portable Devices

Recently, many wonderful tablet computers and smartphones, especially some Android devices, have come into the market and are rapidly gaining in popularity. So to help these portable device users have a wonderful experience enjoying videos, Aiseesoft has decided to update their .

After the update, this professional DVD Converter Suite is able to convert all popular video files and rip DVD to nearly all video and audio formats, like MP4, H.264, AVI, WMV, FLV, MKV, 3GP, VOB, DivX, MOV, M4A, AAC, WAV, MP3, etc. And you can define your own output video/audio format supported by your portable devices. Now, this DVD Converter Suite supports iPad (iPad 2), iPhone (iPhone 4), iPod, BlackBerry (PlayBook), Android phones (HTC, Motorola, Sony Ericsson, etc.), tablet computer (Xoom, Galaxy Tab, LG G-Slate, etc.), and other popular portable devices.

Aiseesoft DVD Converter Suite is packed with Total Video Converter, DVD Ripper and iPod to Computer Transfer. Both the Total Video Converter and DVD Ripper own powerful video editing features. For instance, you can crop video frame, watermark video, cut off any segment from video/DVD source, join videos together and so on. With it, you can get a personalized output video. The built-in iPod to Computer Transfer is a powerful file transferring software to transfer iPod/iPhone/iPad movie, music and image files to computer for backup.

In summary, Aiseesoft DVD Converter Suite is specially optimized for the up-to-date portable devices. It can convert DVD and video files to popular video formats and transfer video/audio/photo from iPod to computer.

Apart from the all-in-one DVD Converter Suite, Aiseesoft specially prepares the iPad 2 assistant software, such as iPad 2 Video Converter and DVD to iPad 2 Converter for iPad 2 users. You can download the easy-to-use and reliable DVD video converter software free and have a try.

System Requirements

OS Supported: Windows NT4/2000/2003/XP and Windows Vista, Windows 7

Hardware Requirements: 800MHz Intel or AMD CPU, or above; 512MB RAM or more

2011年9月21日星期三

How to Copy DVD/ISO image/DVD Folder to DVD/ISO image/DVD Folder for Windows/Mac

When you have bunches of DVD movies, it is really hard to take care of them. The disc is really easy to break. So make a copy of your DVD movies to another DVD disc or ISO image or DVD Folder. How?
When you have bunches of DVD movies, your friends must come and borrow your movies to watch. How to protect your movie disc from being broken? Borrow them a copy?
How?
When your family have a party and it is really sweet, everyone wants to have a copy of the party's video. But they make only one DVD of it. How to make everyone has the record of the happy time? Copy the DVD.
How?

These problems are easy to solve now, if you have this powerful DVD Copy Software.
It can help you to make copys of your DVD. If you want to backup your DVD movies, you can choose to copy the full disc or the main movie. It can also copy a DVD to ISO image and DVD Folder on your computer. Also it can copy your ISO image or DVD Folder to a DVD disc to play in DVD player.

Here is a simple guide for you to follow:
For Windows users:

Step 1 Choose Source:
The source of this DVD copy software can be:
1: DVD disc
2: ISO image
3: DVD Folder
Tip 1: The specific information of the DVD disc will be shown on the top-left of the interface.

Step 2. Preparation
Before you click the “Start” button,
1. You can choose to copy the full disc or the main movie.
2. You can choose the audio, subtitle of the copy.
3. You can change the name of the volume.
4. You can choose to “include menu” or “skip menu” or neither of them.

Step 3. Choose Target:
You can save your DVD movie as:
1: DVD disc
2: DVD Folder
3: ISO Image File

Step 4: Start Copy

Click “Start” button to start the copy.

Tip 2:
You can change the “Preference”, when you click “Edit” button.

For Mac users:

This DVD Copy for Mac software is the best DVD copy for Mac users.
Let's begin to copy DVDs:
Step 1: Download and install DVD Copy for Mac


Step 2: Load Your Source
This excellent DVD copy for Mac allows you to load DVD folder and DVD image ISO.

Step 3: Choose Output Info
1. “Full Disc” or “Main Movie”
This DVD copy for Mac enables you to copy the full disc and also the main movie according to your need.

2. “Audio”, “Subtitle” and “Volume” name
You can choose your output audio from the “Audio” drop-down list, such as “all audio”/ “None”/ or some audio the DVD provide.

Subtitle is always an important thing, you can choose your output subtitle in “Subtitle” drop-down list.

You can also name your output volume's name

Step 4: Choose Your Target
You can copy your DVD to another DVD disc, DVD folder or DVD image ISO.

Tips:
1. You can also choose to copy the menus or not.
2. All the info you choose will be displayed on the “Info Box”.

2011年9月20日星期二

Aiseesoft's Newly Updated DVD Converter Suite Supports More Portable Devices

Recently, many wonderful tablet computers and smartphones, especially some Android devices, have come into the market and are rapidly gaining in popularity. So to help these portable device users have a wonderful experience enjoying videos, Aiseesoft has decided to update their DVD Converter Suite.

After the update, this professional DVD Converter Suite is able to convert all popular video files and rip DVD to nearly all video and audio formats, like MP4, H.264, AVI, WMV, FLV, MKV, 3GP, VOB, DivX, MOV, M4A, AAC, WAV, MP3, etc. And you can define your own output video/audio format supported by your portable devices. Now, this DVD Converter Suite supports iPad (iPad 2), iPhone (iPhone 4), iPod, BlackBerry (PlayBook), Android phones (HTC, Motorola, Sony Ericsson, etc.), tablet computer (Xoom, Galaxy Tab, LG G-Slate, etc.), and other popular portable devices.

Aiseesoft DVD Converter Suite is packed with Total Video Converter, DVD Ripper and iPod to Computer Transfer. Both the Total Video Converter and DVD Ripper own powerful video editing features. For instance, you can crop video frame, watermark video, cut off any segment from video/DVD source, join videos together and so on. With it, you can get a personalized output video. The built-in iPod to Computer Transfer is a powerful file transferring software to transfer iPod/iPhone/iPad movie, music and image files to computer for backup.

In summary, Aiseesoft DVD Converter Suite is specially optimized for the up-to-date portable devices. It can convert DVD and video files to popular video formats and transfer video/audio/photo from iPod to computer.

Apart from the all-in-one DVD Converter Suite, Aiseesoft specially prepares the iPad 2 assistant software, such as iPod to Computer Transfer and DVD to iPad 2 Converter for iPad 2 users. You can download the easy-to-use and reliable DVD video converter software free and have a try.

System Requirements

OS Supported: Windows NT4/2000/2003/XP and Windows Vista, Windows 7

Hardware Requirements: 800MHz Intel or AMD CPU, or above; 512MB RAM or more

2011年9月19日星期一

Aiseesoft Updates Blu-ray Ripper for Mac to Support WD TV Media Player

WD TV Live and WD TV Live Plus media player enables users to enjoy 1080p HD movies on a home theater system in comfort. The two media players support a wide variety of video and audio files. However, if you are a Mac user and want to enjoy Blu-ray movies with WD TV Live and WD TV Live Plus at 1080p, you need the help of a professional Blu-ray to WD TV Ripper for Mac OS.

Now Aiseesoft Blu-ray Ripper for Mac gets updates to support both WD TV Live and WD TV Live Plus. This Mac Blu-ray Ripper can remove any Blu-ray copy protection and rip the BD to most popular video, HD video and audio formats supported by WD TV media player. And this software can provide users with perfect output quality and amazing converting speed.

To help users get a customized output video, this software enables users to edit video effect with strong video editing functions. For instance, you can trim a specified Blu-ray clip and rip it to WD TV, crop video frame, add a watermark to the Blu-ray movie, modify video brightness/saturation/contrast and join different Blu-ray playlists together.

With Aiseesoft Blu-ray Ripper for Mac, users can conveniently enjoy any Blu-ray movie on your widescreen TV with WD TV.

System Requirements

Processor: PowerPC® G4/G5 or Intel® processor

OS Supported: Mac OS X v10.4 - 10.6

Hardware Requirements: 512MB RAM, Super VGA (800×600) resolution, 16-bit graphics card or higher.

2011年9月18日星期日

Aiseesoft Releases iPad Transfer Platinum

In order to provide users with a much more powerful iPad assistant tool, Aiseesoft bring users a bran-new iPad transferring software – Aiseesoft iPad Transfer Platinum. It has got fully upgrades compare with the standard version of iPad Transfer, and it can meet nearly all needs of iPad users.

iPad Transfer Platinum

This iPad transferring software is actually a combination of iPad converter and iPad transfer. It can help you convert Blu-ray, DVD, video and audio files to iPad compatible formats and transfer nearly all iPad files between iPad and computer. Even it allows you to make your own iPhone ringtones with source video and DVD movies.

This professional iPad Transfer Platinum can help customers transfer music, movies, pictures, TV shows, Podcast, iTunes U, eBooks, Camera Roll, voice memos, camera shot from iPad to computer, and import music, video, ePub, PDF, image files from computer to iPad.

Also if you just bought a new iOS device (iPad, iPhone or iPod) and want to transfer files from the old device to the new one, this transferring software can also realize this function.

As a professional iPad Converter, this software is able to convert almost all Blu-ray movies, DVD and video files to iPad MP4, MOV, M4V, H.264, etc. video with perfect output video quality. Also it owns powerful video editing features. For instance, you can cut off any video segment from your source video and convert it to iPad. Also you can crop video frame and add watermark to your video. What’s more, this software supports adjusting video brightness, saturation, contrast, hue and contrast. So you can definitely create the prefect iPad video with this iPad Transfer Platinum.

Also Aiseesoft prepares other platinum versions of the transferring software, like iPad 2 Transfer Platinum, iPhone Transfer Platinum, iPhone 4 Transfer Platinum, and iPod Transfer Platinum.

2011年9月15日星期四

Aiseesoft Updates iPad Transferring Software for Mac for the iPad 2 and iOS 4.3

Since the arrival of iPad 2, Aiseesoft has noticed the great demand among our customers for iPad 2 transferring tools. Apart from releasing the specialized iPad 2 to Mac Transfer and iPad 2 Manager for Mac, we also updated our existing iPad to Mac Transfer and iPad Manager for Mac to support the latest iPad 2.

Aiseesoft iPad to Mac Transfer can help you realize some useful tasks that the iTunes cannot do. For example, it allows you to transfer iPad movies, music and images to local disk on Mac. Also you can copy these iPad files to iTunes for backup.

Aiseesoft iPad Manager for Mac is a two-way transfer with greater transferring features. Besides copying iPad music, songs and photos to Mac and iTunes, this Mac iPad Transfer also supports adding local files to iPad and iPad 2. Moreover, this iPad Manager for Mac can convert your DVD and video/audio files to iPad (iPad 2) compatible video and audio formats. You can also import the converted files to iPad directly.

Both of the two transferring tools can work perfectly with the latest iOS 4.3, and the intuitive interface can make all operations of the software much easier.

System Requirements

Processor: Intel® processor

OS Supported: Mac OS X v10.4 - 10.6

Hardware Requirements: 512MB RAM, Super VGA (800×600) resolution, 16-bit graphics card or higher.

2011年9月13日星期二

Aiseesoft DVD Ripper for Mac - Helping Users Enjoy DVD Video on iPad 2

With the diversity of video formats, converting DVD to other formats has become an essential requirement of most multimedia users. Plus, since iPad 2 only supports MPEG-4, H.264/MPEG-4 AVC, MOV, M4V video formats and AAC, MP3, WAV, AIFF, M4A audio formats, it is impossible for iPad 2 users to play DVD movies on iPad 2. Now, the newly-updated best DVD Ripper for Mac will be their best choice to solve the problem.

Aiseesoft DVD Ripper for Mac is powerful software and very easy to use, which can rip DVD to popular video or audio such as MPEG-4, H.264/MPEG-4 AVC, MOV, M4V and AAC, MP3, WAV, AIFF, M4A to satisfy iPad 2. This best DVD Ripper for Mac also provides a wealth of conversion programs for the iPod, iPhone, PSP, Zune, Apple TV and other digital devices, so that you can easily convert DVD to formats which these devices support.

The best DVD Ripper for Mac provides video editing functions which make your conversion more flexible. With this best DVD Ripper for Mac, you can clip video segments, crop video size, edit video effects and add watermarks.

This Aiseesoft DVD Ripper for Mac deserves to be the best DVD Ripper software for Mac users:

2.

DVD audio extraction


The best DVD Ripper for Mac can extract DVD audio and convert it into various audio formats such as MP3, WAV, WMA, AAC, AC3, AAC, AIFF, AMR, AU, FLAC, MP2, OGG audio formats.


3.

Capture video image


With this best DVD Ripper for Mac, you can use any DVD video clips in a fixed time to crawl down the screen.


4.

Edit video effects


This DVD Ripper for Mac provides a powerful video editing function which allows you to crop video, adjust video subtitle, edit video effects, add video watermark.


5.

Merge files into one


This Mac DVD ripper allows you to put two or more files you choose into one output file.


Overall, the best DVD Ripper can meet the needs of you, so that you can get a perfect experience.

System Requirements

Processor: Power PC ® G4/G5 or Intel ® Processor

Os Supported: Mac OS X v10.4 – 10.6

Hardware Requirements: 521MB RAM, Super VGA (800 x 600) resolution, 16 – bit graphics card or higher

Pricing and Availability

Aiseesoft DVD Ripper for Mac is available now at $35.00.

2011年9月12日星期一

Aiseesoft DVD Ripper for Mac Gets Major Update

Aiseesoft, a top-ranking Windows and Mac Blu-ray/DVD/video converting software provider, announced a major update to DVD Ripper for Mac last Friday. This new DVD Ripper for Mac brings users a large number of new wonderful features and improvements. In general, this DVD ripping software for Mac is re-developed with Qt development framework, and it supports 5.1 Dolby surround sound and the WebM output video format. Also many other special and neat changes were made.

Detailed information of the updated DVD Ripper for Mac:

  • More user-friendly graphical interface
  • Enhance the ability of parsing DVD
  • Improve the "Merge" feature
  • Support outputting video without audio track
  • Support adjusting output file volume
  • Renew the output profile
  • Support setting output video aspect ratio

Aiseesoft DVD Ripper for Mac is professional DVD ripping software designed for Mac users. It can help users rip any DVD to popular video files, like AVI, MP4, MOV, MKV, WMV, FLV, DivX, XviD, MPEG-1/2, 3GP, VOB, HD TS, HD MTS, HD M2TS, etc. on Mac. So this wonderful software enables customers to enjoy DVD movies on any portable devices, such as iPad, iPhone, iPod touch, smartphone, PSP, Android devices, BlackBerry, etc.

Also this Mac DVD Ripper has powerful video editing features. For instance, it can help customers cut off any DVD segment and convert it to video file, crop video frame, add any text/image watermark to their video, join DVD clips together, and even adjust video brightness/saturation/contrast/hue/volume.

System Requirements

OS Supported: Mac OS X v10.4 - v10.7

Hardware Requirements: 512MB RAM, Super VGA (800×600) resolution, 16-bit graphics card or higher.

2011年9月9日星期五

How to convert MPEG to iPhone?

MPEG (Moving Picture Experts Group) is the name of a family of standards used for coding audio-visual information (e.g., movies, video, music) in a digital compressed format. With the very sophisticated compression techniques, MPEG files are much smaller for the same quality.

Apple iPhone supports playing MP4 and H.264 video. If you want to enjoy the MPEG (MPEG-1/MPEG-2) video on iPhone, you need the help of a professional MPEG to iPhone Converter. Aiseesoft iPhone Movie Converter is the best MPEG to iPhone Converter to help you enjoy the MPEG video on iPhone. This guide will help you convert MPEG to iPhone video successfully step by step.

Step 1: Install MPEG to iPhone Converter

First, you need to free download this MPEG to iPhone Converter and install the program on your computer. After launching the application, you can see the interface as below.

MPEG to iPhone Converter

Step 2: Add MPEG video

You can click the "Add Video" button to input the MPEG file you want to convert.

add MPEG video

This iPhone Movie Converter provides users with a built-in player, which can help you preview the video effect. When your video is playing, you can capture the excellent pictures by clicking the camera icon.

Step 3: Customize output video effect

If you are not satisfied with the MPEG video effect, this MPEG to iPhone Converter provides you with powerful video editing features.

adjust iPhone video effect

You can click the "Trim" icon in the main menu to enter the trim window. Then you can set the start time and end time to specify the video length.

Also you can set brightness, contrast, saturation, hue and volume in the effect window, add text/image watermark in the watermark window and crop video frame in the crop window.

Step 4: Choose output iPhone format

Now you can click the "Profile" drop-down list to choose the output iPhone format for the MPEG video. For instance, you can choose "Apple iPhone > iPhone MPEG4 Video (*.mp4)".

choose output iPhone video

Also you can set numerous output settings by clicking the "Settings" button. In this window, you can set video encoder, frame rate, video bitrate, resolution, audio encoder, sample rate, channels, audio bitrate, and aspect ratio.

Step 5: Convert MPEG to iPhone

The last step is to click the "Convert" button in the main menu to convert the source MPEG video to iPhone compatible video and audio formats. And this wonderful MPEG to iPhone Converter will bring you a wonderful iPhone video with perfect output quality after a few minutes or hours.

2011年9月8日星期四

How to convert and edit HD video

Because of the widely using of HD Camcorder, now it is really convenient to record family parties and other things you are interested in. Nowadays, people would like to share their things with the rest of the world through Internet, such as youtube.com and other video websites.

This guide aims to show you how to convert and edit the video you recorded using your HD camcorder
What you need is a powerful HD Video Converter.

Step 1: Load Video
Click “Add File” to load the video that you want to convert.


Step 2: Choose Your Output Profile and Settings.
From “Profile” drop-down list you can choose your output profile according to your need.
You can also click “setteing”adjust the settings of your output video, such as “video/audio encoder”, “Video/audio Bitrate”, “Channels”, “Resolution” and so on..
Step 3: Video Editing.
This powerful MTS Converter allows you to do many video editings.
1. Click "Effect". to make special effect for your movie.
You can adjust the “Brightness”, “Contrast”, “Saturation” and also you can use “deinterlacing” to improve you output effect.

2. Trim: .
“Trim” function allows you to pick up any part of your video to convert. You can just convert a part of your video that you want.

3: Crop: .
Cut off the black edges of the original movie video and watch in full screen on your iPod using the "Crop" function.

Step 4: Conversion.
After you have done all the steps above you can click “Start” button to start your conversion.

Here I also recommend you some High Definition video converter, MTS Converter, TS Video Converter.

2011年9月5日星期一

How to Convert Video Files on Mac/Windows

Nowadays, people can enjoy videos in different ways, such as youtube.com and other online video websites, iPod/Zune and other portable players, and also play video on computer, and you can also make you own videos with windows movie make or iMovie for Mac users. So how to convert videos between different video formats is a big problem for both windows and Mac users. Today I will share you guys two powerful video converter for Mac and Windows users.

For Mac users, this powerful video converter for mac is really nice.
Let's use it to convert a video for Example


Step 1: Add File
Click “Add File” button to load the video you want to converter

Step 2: Choose profile and adjust settings
You can find your output video format from a drop-list called “Profile”
You can also adjust the specific settings of the output video, such as “Resolution”, “Bitrate”, “Encoder” and so on.

Step 3: Edit Video
1. Effect:
You can adjust the “Brightness”, “Contrast”, “Saturation” and “Volume”

2. Trim:
You are allowed to pick up any part of the video to convert.

3. Crop:
To remove the black edges and choose a play area to convert.

Step 4: Start Conversion
Click “Start” button to begin your conversion and you will get your video soon.

For Windows users, you need Total Video Converter.


Step 1: Load Video
You can load your videos into the converter by clicking “Add File”

Step 2: Choose output info
This converter provides you many output profiles for you to choose, you can choose your output profiles according to your need. And also you can just choose a certain video format.

You can also adjust the settings of your output profiles. You can even save a certain settings as your own output settings.

Step 3: Conversion
Click “Start” button to begin your conversion and few mins later you can get your video.

Tips: How to effect, trim and crop the video to improve your output video quality.
After your Load your video you can click “Effect” button to access the effect panel

1: Effect
Adjust the video effect as you want: Brightness, Contrast, Saturation and Deinterlacing.

2: Trim
Clip your video, pick up any part of your video to convert.
You have 3 ways to do trim:

1.Dragging the slider

2.Controlling the “Trim From” and “Trim To” button

3.Setting the Start and End time

3: Crop
Adjust video size, Cut off the black edge of your video to let you enjoy your movie in full screen by click the 'Crop' button
You have 2 ways to do crop:

1.Move your mouse cursor onto one of the eight small adjustment boxes on the cropping frame and drag the crop frame to crop the video such as cutting off top and bottom black bar. The cropped result will be shown on the Output Preview at the same time

2.Type the value directly or set the value in "Left", "Right" and "Cropped area size" area to set the position of the cropping frame.

You can also select the aspect ratio from the Zoom Mode drop-down list. There are 4 choices for you: Full Screen, 16:9, 4:3 and Keep Original.

2011年9月4日星期日

How to Rip DVD, Convert Video, Backup iPod info,Make iPhone Ringtone, Copy DVD on Mac

Two years ago, I had my first Mac. Today I get my new MacBook Pro. So I am totally a Mac fan now. I enjoy my Mac very much. I always watch movies on my Mac and sometimes rip my DVD movies on it and convert video to another format. Also I make my own iPhone ringtone on it. And recently, I copy my DVDs on it as well. Now I will share my experience with you.

My article includes 5 part:
Part 1. How to rip DVD to video format on Mac
Part 2. How to convert video on Mac
Part 3. How to transfer info between iPod and Mac
Part 4. How to make iPhone ringtone on Mac
Part 5. How to copy DVD on Mac

Before we get start, I want to introduce you a really powerful tool:
Aiseesoft DVD Software Toolkit for Mac. It can do what I said above easily.

Part 1. How to rip DVD on Mac
Just click DVD Ripper for Mac on the main interface.

Step 1. Load you DVD.
Click the “Load DVD” button(a), find the DVD folder of the movie you want to add from your DVD-ROM, and Click “Open”.

Tick the check boxes(b) before the titles and chapters that you want to rip.

Step 2. Chose output profile and settings.
Selecting output format is really easy, you can chose your output format according to your devices players and the default setting works great.

Tips: Sample rate (Hz) = any value up to 48000 (higher value = better sound quality = bigger file)
Bitrate (kbps) = any value up to 160 (higher value = better sound quality = bigger file)
After setting your own output and settings you can click “Start” button to start your conversion. (The time of the conversion depends on your DVD and the settings you chose.)

Part 2. How to convert video on Mac
Click Video Converter for Mac on the interface.


Step 1. Load video
Easily click “Add File” to load your video that you want to convert.

Step 2. Choose output profile and settings
At the bottom of the interface there are a drop-download list named “profile”. You can choose your output format here.

You can also adjust the settings of your output video, such as Resolution, Bit rate and so on.
After you finish the 2 steps, you can just click “Start” button to start your conversion.

Part 3. How to transfer info iPod and Mac
Use iPod Manager for Mac

Step 1. Plug your iPod to your Mac
Aiseesoft iPod Manager for Mac can find it automatically.

Step 2.
a. if you want to transfer music and videos from iPod to Mac

Pick up what you want to backup
Just click Music and all of your music on your iPod will be listed, so you can pick up which songs you want to transfer. (Click “Video”/“Picture”, if you want to backup your videos and image.)

Click “iPod to Mac” and find where to put your iPod info on your Mac and click “Open”

b. if you want to put music and videos from Mac to iPod.
1. Click “Music”
2. Click “Mac to iPod” and pick up the songs on your Mac you want to put on your iPod and click “Open”
(If you want to put video/image, just click “Video”/“Picture” and other operation is the same as putting songs)

Part 4. How to make iPhone ringtone on Mac

Click iPhone Ringtone Maker for Mac on the main interface.

Step 1: Click “Browse” on the right side of "Input File" to import the file that you want to make ringtone from it.

Step 2: Play it and listen the music to find the segment that you want to use it as ringtone. Then drag and click the start & end slider to set your wanted segment, or type the start & end time in the corresponding text box directly to get the exact segment. You also can pre-listen the converted audio before generate.

Step 3: Click “Browse” on the right side of "Local Output Folder" to choose the output destination.

Step 4: Check "Export to iPhone" option, the converted ringtone will be load to your iPhone directly.
[b]Step 5[/b]: After all the settings are finished, click “Generate” to begin making your own iPhone ringtone.

Key function
● Convert any video to iPhone ringtone M4R
● Create iPhone ringtone from any audio files
● Get any clips from video and audio
Edit Added iPhone ringtones

Part 5. How to copy DVD on Mac
You need to use DVD Copy for Mac.

Step 1. Load Your Source
This excellent DVD copy for Mac allows you to load DVD folder and DVD image ISO.

Step 2. Choose Output Info
1. “Full Disc” or “Main Movie”
This DVD copy for Mac enables you to copy the full disc and also the main movie according to your need.

2. “Audio”, “Subtitle” and “Volume” name
You can choose your output audio from the “Audio” drop-down list, such as “all audio”/ “None”/ or some audio the DVD provide.

Subtitle is always an important thing, you can choose your output subtitle in “Subtitle” drop-down list.

You can also name your output volume's name

Step 3. Choose Your Target
You can copy your DVD to another DVD disc, DVD folder or DVD image ISO.

Tips:
1. You can also choose to copy the menus or not.
2. All the info you choose will be dispalyed on the “Info Box”.